The answer is: it depends on the type of roast you’re preparing and your personal preference. Let’s dive into why this choice matters.
For lean roasts like beef tenderloin or pork loin, cooking fat side down is typically the way to go. This allows the fat to melt into the meat, keeping it moist and tender. On the other hand, thicker cuts with more fat, such as prime rib or pork shoulder, benefit from cooking fat side up. This method enhances flavor and juiciness as the fat bastes the meat during cooking.
Here are the key takeaways:
- Lean Roasts: Cook fat side down for moisture and tenderness.
- Thicker Fat Layers: Cook fat side up for enhanced flavor and juiciness.
- Historical Context: The fat side up method gained popularity in mid-20th century cookbooks.
- Rotisserie Cooking: Fat side up is the default for continuous basting.
- Experimentation: Try different methods to find your favorite technique.
- Resting and Temperature: Always rest your roast for at least 15 minutes and use a thermometer to check doneness.
- Cooking Methods: For smokers, fat side up for basting; fat side down as a heat barrier.
- Searing: Avoid searing fatty roasts to prevent flare-ups; sear other sides instead.
Understanding these nuances can make a significant difference in the outcome of your roast, ensuring it is perfectly cooked every time.
Contents
- 1 Fat Side Up: Enhancing Juiciness, Tenderness, And Taste
- 2 Fat Side Down: Retaining Flavor And Protecting From Direct Heat
- 3 Flipping Meat: Basting And Preventing Drying Out
- 4 Heat Sources In Food Smokers: Underneath Or Above
- 5 Grilling A Beef Roast: Tips And Tricks For Tender And Flavorful Meat
- 6 Conclusion
Fat Side Up: Enhancing Juiciness, Tenderness, And Taste
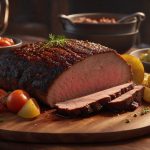
Cooking a roast with the fat side up enhances its juiciness, tenderness, and taste by allowing the fat to melt and baste the meat throughout the cooking process. This method is particularly beneficial for roasts with a thicker layer of fat, like prime rib or pork shoulder. Here’s how it works:
| Aspect | Enhancement | Explanation |
| Juiciness | Continuous Basting | The fat melts and drips down, continuously basting the meat and keeping it moist. This self-basting process prevents the meat from drying out, especially in longer cooking times. |
| Tenderness | Moist Cooking Environment | The melting fat creates a moist cooking environment that helps break down connective tissues, making the meat more tender. This is particularly useful for tougher cuts of meat. |
| Taste | Enhanced Flavor | The rendered fat adds a rich, savory flavor to the meat’s exterior, enhancing its taste. The fat can also create a crispy, flavorful crust, adding texture and depth to the roast. |
Additional Insights:
- Seasonings and Flavor: While cooking fat side up enhances juiciness and tenderness, it may wash off some surface seasonings. To counter this, consider seasoning the roast under the fat layer or using a rub that adheres well to the meat.
- Cooking Techniques: In methods like rotisserie cooking, placing the roast fat side up ensures continuous basting, resulting in a succulent roast. For smokers with heat sources below, this positioning maximizes the benefits of rendered fat, while for heat sources above, it helps prevent charring.
- Types of Roasts: Leaner cuts like beef tenderloin or pork loin benefit more from cooking fat side down, as their thinner fat layers can directly penetrate the meat. Thicker cuts with substantial fat caps, however, are best cooked fat side up for optimal juiciness and flavor.
Experimenting with different methods will help find the perfect technique for your preferred roast. Always remember to rest the meat after cooking to allow juices to redistribute, ensuring a moist and tender final product.
Fat Side Down: Retaining Flavor And Protecting From Direct Heat
Placing the fat side down on a roast helps retain its flavor and protect it from direct heat by creating a barrier that prevents excessive charring and surface drying.
| Aspect | Fat Side Down | Fat Side Up |
| Protection from Heat | Shields meat from direct heat | Exposes meat to more direct heat |
| Moisture Retention | Keeps meat moist by melting fat into it | Bastes meat continuously as fat melts |
| Flavor Enhancement | Enriches meat with fat’s flavors | Fat basting enhances flavor |
| Charring Risk | Reduces charring of the meat | Increases risk of meat surface charring |
Flipping Meat: Basting And Preventing Drying Out
Flipping meat while basting acts as a crucial method for maintaining its moisture, ensuring even cooking, and enhancing its flavour. Here’s how it works:
How Flipping Helps:
- Uniform Heat Distribution: Regular flipping distributes heat more evenly across the meat, preventing the sides closest to the heat source from drying out while the other side cooks. This balanced heat exposure aids in achieving a consistent internal temperature, reducing the risk of overcooking.
- Continuous Moisture Application: Basting, particularly with butter or oil, creates a protective layer that keeps moisture locked inside. By flipping the meat and spooning the basting liquid over it, you ensure that both sides receive a continuous coating. This constant application helps replenish the surface moisture that might evaporate due to heat, maintaining the meat’s juiciness.
- Enhanced Browning: Flipping allows both sides of the meat to brown properly, contributing to the development of the Maillard reaction, which is key to a flavorful crust. This reaction requires a balance of heat and moisture, which flipping and basting help to regulate.
Tips for Effective Flipping and Basting:
| Action | Tip | Explanation |
| Flipping | Flip every 30-60 seconds | Ensures even cooking and prevents one side from drying out. |
| Basting | Baste every time you flip | Keeps both sides coated, maintaining surface moisture and enhancing flavour. |
| Basting Liquid | Use seasoned butter or oil | Fat adds flavour and aids in browning while preventing sticking. |
Heat Sources In Food Smokers: Underneath Or Above
The positioning of the heat source in a food smoker can significantly affect the cooking process. Below are the advantages and disadvantages of placing the heat source either underneath or above the food:
| Heat Source Placement | Advantages | Disadvantages |
| Above the Food |
|
|
| Underneath the Food |
|
|
Grilling A Beef Roast: Tips And Tricks For Tender And Flavorful Meat
When grilling a roast, the placement of the fat side can significantly influence the final outcome. Here’s a breakdown of the considerations to help you decide:
Type of Roast
- Lean Cuts (e.g., Beef Tenderloin, Pork Loin): Place fat side down. Lean cuts benefit from having the fat melt into the meat, keeping it moist and tender.
- Fatty Cuts (e.g., Prime Rib, Pork Shoulder): Place fat side up. This allows the fat to render and baste the meat, enhancing flavor and juiciness.
Type of Grill
- Gas Grill: Place fat side up. Gas grills provide even heat distribution, allowing the fat to render and baste the meat effectively.
- Charcoal Grill: Place fat side down. Charcoal grills often have hotter spots towards the bottom, and placing the fat side down helps protect the meat from direct heat and prevents burning.
Heat Flow
- Upward Heat Flow: Fat side up allows the melting fat to baste the meat from within, resulting in a juicier roast.
- Direct Heat Protection: Fat side down acts as an insulator, protecting the meat from direct heat and preventing uneven searing.
Personal Preference and Experimentation
- Basting and Moisture: If you prefer a roast with enhanced juiciness and flavor, experiment with placing the fat side up.
- Even Searing: For a more even sear on the bottom, try placing the fat side down, especially on charcoal grills where direct heat is stronger.
Conclusion
Deciding whether to cook a roast fat side up or down hinges on the type of roast and your desired outcome. Lean cuts like beef tenderloin and pork loin benefit from cooking fat side down. This method ensures the melting fat permeates the meat, preserving moisture and tenderness. For thicker, fattier cuts such as prime rib or pork shoulder, placing the fat side up is ideal. This technique enhances flavor and juiciness by allowing the fat to melt and baste the meat throughout the cooking process.
A key advantage of fat side up is its continuous self-basting effect, which keeps the meat moist during long cooking periods, while also creating a rich, flavorful crust. Conversely, cooking fat side down provides a protective barrier against direct heat, reducing the risk of burning and ensuring the meat remains juicy and flavorful. This is especially beneficial for leaner cuts that are prone to drying out.
Ultimately, the choice boils down to personal preference and the specific cut of meat. Experimenting with both methods can help determine which works best for your taste.

